
我的需求是使用loki存储数据,然后最后在grafana中展示,目前grafana已经部署好了,所以我们需要部署loki,我记得我此前工作一家公司是loki+promtail的组合,但是目前查询到promtail没有维护了,然后经过查资料,目前推荐使用alloy来采集日志推送到loki进行存储。那么我们接下来看下如何配置loki和alloy
对于新项目,官方首选的采集器其实是 Grafana Alloy。它旨在统一收集日志(Logs)、指标(Metrics)和链路追踪(Traces)。如果你的目标是构建“可观测性平台”,Alloy 是比 Promtail 更超前的选择。Alloy和Loki都是使用helm来安装,那么helm的安装这里我就不再赘述了,此前的笔记有记录。
我们先添加grafana的repo仓库,Loki和Alloy都在这个repo中
helm repo add grafana https://grafana.github.io/helm-charts
helm repo update
values-loki.yaml的配置如下
deploymentMode: SingleBinary
loki:
  auth_enabled: false
  commonConfig:
    replication_factor: 1

  schemaConfig:
    configs:
      - from: 2026-01-01
        store: tsdb
        object_store: filesystem
        schema: v13
        index:
          prefix: loki_index_
          period: 24h

  storage:
    type: 'filesystem'

  # ========== 以下为新增的 retention 配置 ==========
  limits_config:
    retention_period: 2160h          # 90天 = 90*24h

  compactor:
    working_directory: /var/loki/compactor
    compaction_interval: 10m         # 每10分钟执行一次压缩
    retention_enabled: true
    retention_delete_delay: 2h       # 删除操作延迟2小时
    retention_delete_worker_count: 150
    delete_request_store: filesystem
  # ============================================

singleBinary:
  replicas: 1
  persistence:
    enabled: true
    mountPath: /var/loki
    storageClass: loki-storage
    size: 1000Gi

read:
  replicas: 0
write:
  replicas: 0
backend:
  replicas: 0
这里看到我们写了一个loki-storage的存储对象,但实际我没有共享存储和对象存储,使用的本地存储,那么我定义了一个storageClass名字为loki-storage的loki-pv.yaml,配置如下
实际我的pv做了节点亲和性,因为我数据直接使用本地目录,避免loki重启调度到其他节点导致读取不到数据。
kind: PersistentVolume
apiVersion: v1
metadata:
  name: loki-pv
  labels:
    release: stable
spec:
  capacity:
    storage: 100Gi
  accessModes:
    - ReadWriteOnce
  persistentVolumeReclaimPolicy: Recycle
  storageClassName: loki-storage
  hostPath:
    path: /data/loki
    type: DirectoryOrCreate
  nodeAffinity:
    required:
      nodeSelectorTerms:
      - matchExpressions:
        - key: kubernetes.io/hostname
          operator: In
          values:
          - gpu-10-82-32-7
然后就可以部署了,我们先创建命名空间,然后部署pv和loki。
kubectl create ns loki-stack
kubectl apply -f loki-pv.yaml

helm upgrade loki grafana/loki \
  --install --namespace loki-stack \
  --values values-loki.yaml
接着我们部署Alloy,创建一个values-alloy.yaml配置文件,内容如下
controller:
  type: daemonset
alloy:
  configMap:
    create: true
    content: |-
      discovery.kubernetes "pods" {
        role = "pod"
      }
      loki.source.kubernetes "pods" {
        targets    = discovery.kubernetes.pods.targets
        forward_to = [loki.write.local.receiver]
      }
      loki.write "local" {
        endpoint {
          url = "http://loki.loki-stack.svc.cluster.local:3100/loki/api/v1/push"
        }
      }
mounts:
  varlog: true
然后进行部署
helm upgrade alloy grafana/alloy \
--install --namespace loki-stack \
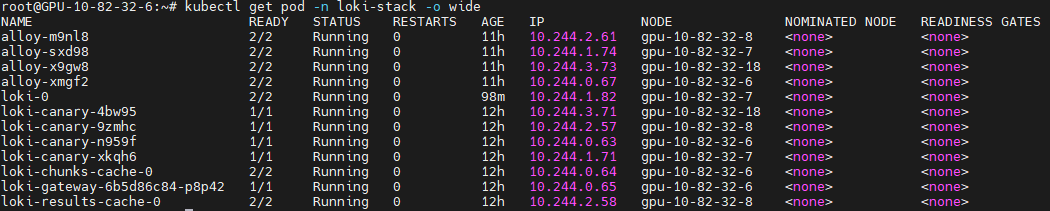
--values values-alloy.yaml最后我们看下有哪些组件
内容版权声明:除非注明,否则皆为本站原创文章。
评论列表